Astrophysics Chat Application#
This module will create an application that allows other users to interact with the application with the previous knowledge from earlier modules. This can be accomplished via any Python frontend framework such as Streamlit or Panel.
For this demo we will use Panel, a powerful open source Python library to create interactive dashboards in Jupyter notebooks or standalone apps.
What is Panel?#
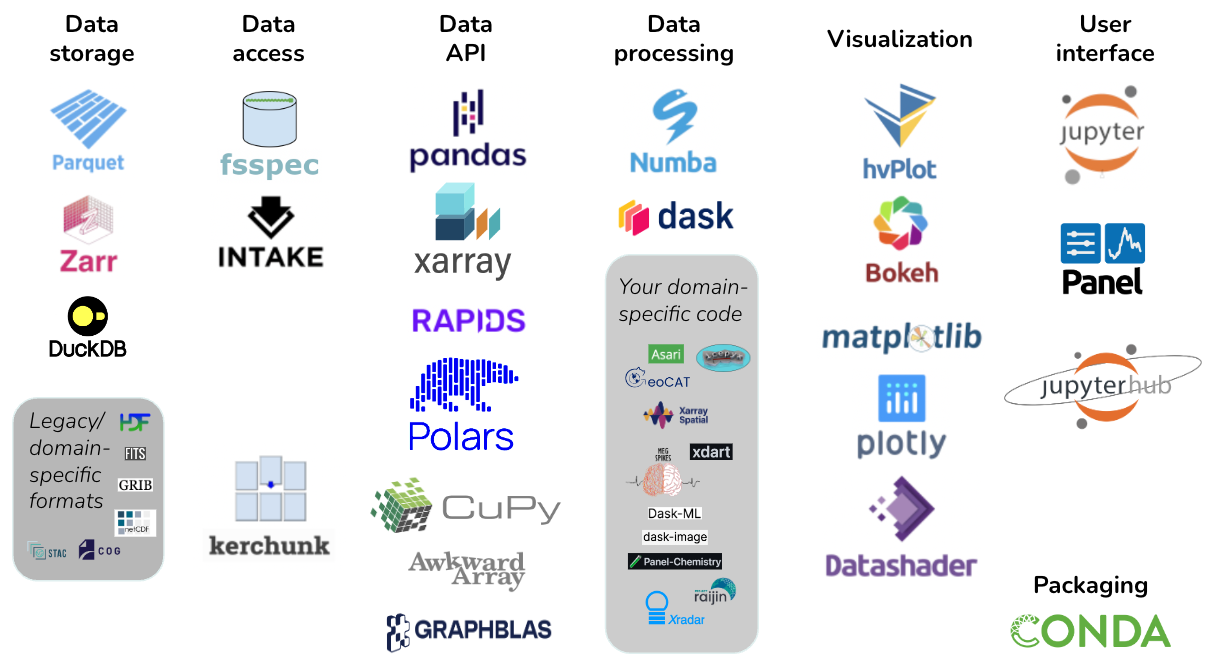
Panel is a part of the HoloViz ecosystem, which is a set of tools that make it easier to work with large datasets and create interactive visualizations. This ecosystem consists of the following tools beyond Panel:
hvPlot to quickly generate interactive plots from your data
HoloViews to help you make all of your data instantly visualizable
GeoViews to extend HoloViews for geographic data
Datashader for rendering even the largest datasets
Lumen to build data-driven dashboards from a simple YAML specification
Param to create declarative user-configurable objects
Colorcet for perceptually uniform colormaps
The nice thing about this ecosystem is that all of these tools are designed to work together as part of the Pandata scalable open-source analysis stack, so you can easily integrate them as needed.
Putting it all together#
Now that you’ve learned the various parts of the Retrievel Augmented Generation (RAG) based approach, let’s put it all together in a simple application that allows users to interact with the model and ask questions about astrophysics, rather than just having a bunch of code that you have to run over and over for each question.
First, Include relevant libraries and packages#
import textwrap
from uuid import uuid4
import warnings


from langchain_core.runnables import RunnablePassthrough
from langchain_core.callbacks import CallbackManager, BaseCallbackHandler
from langchain_core.prompts import PromptTemplate
from langchain_community.llms import LlamaCpp
from langchain_qdrant import Qdrant
from langchain_huggingface import HuggingFaceEmbeddings

from ssec_tutorials import QDRANT_COLLECTION_NAME
from ssec_tutorials import download_olmo_model, download_qdrant_data
Because langchain is a fast developing library, things might change, and we’ll get a lot of warnings. For now, we’ll ignore them.
warnings.filterwarnings("ignore")
Panel has many pre-built frontend components you can put together like legos with Python. So this allows us to create frontend without any Javascript
import panel as pn

pn.extension()
Download the model and vector database#
If you’ve gone through the previous modules, you should have the model and vector database downloaded. The below code will try to download the model and vector database if you haven’t already, otherwise it will load them from their previous location.
model_path = download_olmo_model()
qdrant_path = download_qdrant_data()
Now we’re setting the variables to the Qdrant Vector Database collection name.
This value is retrieved from global variables within the ssec_tutorials utility library that we’ve provided.
qdrant_collection = QDRANT_COLLECTION_NAME
Loading the embedding model and vector database#
As seen in module 2, we can’t have a RAG system without an embedding model and a vector database.
So let’s now load the all-MiniLM-L12-v2 model from HuggingFace and the vector database.
embedding = HuggingFaceEmbeddings(model_name="sentence-transformers/all-MiniLM-L12-v2")
Now we can create a Langchain Qdrant Object that allows for retrieval of documents from the Qdrant database using the specified embedding model instantiated above.
db = Qdrant.from_existing_collection(
    collection_name=qdrant_collection, embedding=embedding, path=qdrant_path
)
Setup the Langchain Chain#
The function get_chain below will setup the Langchain chain with the model and vector database using the various learnings from the previous modules.
def get_chain(callback_handlers: list[BaseCallbackHandler], input_prompt_template: str):
    # 1. Set up the vector database retriever.
    # This line of code will create a retriever object that
    # will be used to retrieve documents from the vector database.
    retriever = db.as_retriever(
        callbacks=callback_handlers,  # pass the result of the retrieval to the callback handler
        search_type="mmr",  # the mmr (maximal marginal relevance, a typical information retrieval tactic) search
        search_kwargs={"k": 2},  # return top 2 results
    )

    # 2. Setup the Langchain callback manager to handle callbacks from Langchain LLM object.
    # At which results are passed to the callback handler.
    callback_manager = CallbackManager(callback_handlers)

    # 3. Setup the Langchain llama.cpp model object.
    # In our case, we are using the `OLMo-7B-Instruct` model.
    # llama-cpp-python is a Python binding for llama.cpp C++ library as mentioned in previous modules.
    olmo = LlamaCpp(
        model_path=str(model_path),  # the path to the OLMo model in GGUF file format
        callback_manager=callback_manager,  # set the callback manager to handle callbacks
        temperature=0.8,  # set the randomness of the model's output
        n_ctx=4096,  # set limit for the length of the input context
        max_tokens=512,  # set limit for the length of the generated text
        verbose=False,  # determines whether the model should print out debug information
        echo=False,  # determines whether the input prompt should be included in the output
    )

    # 4. Set up the initial Langchain Prompt Template using text based jinja2 format
    prompt_template = PromptTemplate.from_template(
        template=olmo.client.metadata[
            "tokenizer.chat_template"
        ],  # get the chat template from the model metadata
        template_format="jinja2",  # set the template format to jinja2
        partial_variables={
            "add_generation_prompt": True,  # add generation prompt to the template, this option is from the model metadata
            "eos_token": "<|endoftext|>",  # set the end of sentence token
        },
    )

    # 5. Transform the Prompt Template to include the user role and the context
    # This will allow the model to generate text based on the context provided.
    # However, after setting this new template, the model will be limited to
    # generating text based on the created prompt template with input of
    # `context` and `question` keys.
    transformed_prompt_template = PromptTemplate.from_template(
        prompt_template.partial(
            # The default chat template takes a list of messages with a role and content
            # to setup this particular app, we will only pass a single message with the user role
            # and the input prompt content
            messages=[
                {
                    "role": "user",  # set the role to user, this allows for user input to be passed to the model
                    "content": input_prompt_template,  # the input prompt template, must have `context` and `question` keys to work
                }
            ]
        ).format()
    )

    # 6. Define the `format_docs` function to format the retrieved Langchain documents object to simple string
    def format_docs(docs):
        text = "\n\n".join([d.page_content for d in docs])
        return text

    # 7. Define the `show_docs` function to display the retrieved documents to app panel
    # this is currently a small hack to display the retrieved documents to the app panel
    # as mentioned in https://github.com/langchain-ai/langchain/issues/7290
    def show_docs(docs):
        for callback_handler in callback_handlers:
            callback_handler.on_retriever_end(
                docs,  # pass the retrieved documents to the callback handler
                run_id=uuid4(),  # generate a random run id
            )
        return docs

    # 8. Return the Langchain chain object
    # The way the chain reads is as follows:
    return (
        {
            # The Vector Database retriever documents,
            # which is then passed to the `show_docs` function,
            # which is then passed to the `format_docs` function for formatting
            "context": retriever | show_docs | format_docs,
            # The Question asked by the user from the Chat Text Input Interface is passed in as well
            "question": RunnablePassthrough(),
        }
        # The dictionary above that contains text values for `context` and `question` is now passed
        # to the transformed prompt template so that the final prompt text can be generated
        | transformed_prompt_template
        # The full final prompt text with both context and question is passed to the OLMo model
        # for generation of the final output. Note that this final prompt text cannot exceed the maximum
        # `n_ctx` input context value set in the OLMo model above.
        | olmo
    )
That was a lot of code to get through, but now we have setup the Langchain chain for a RAG system. However, at this point, we still need an input prompt template that include some instruction and placeholders for the input question and context. The example below, for an Astrophysics Chat Application, we will give an instruction of: You are an astrophysics expert. Please answer the question on astrophysics based on the following context:, with a place for where the context text should go as well as the question.
input_prompt_template = textwrap.dedent(
    """\
You are an astrophysics expert. Please answer the question on astrophysics based on the following context:

{context}

Question: {question}
"""
)
Setup the Panel Chat Application#
At this point, we’ve setup the LLM model, the embedding model, and the vector database in a chain. In the most basic form, these are the components needed to create a RAG system.
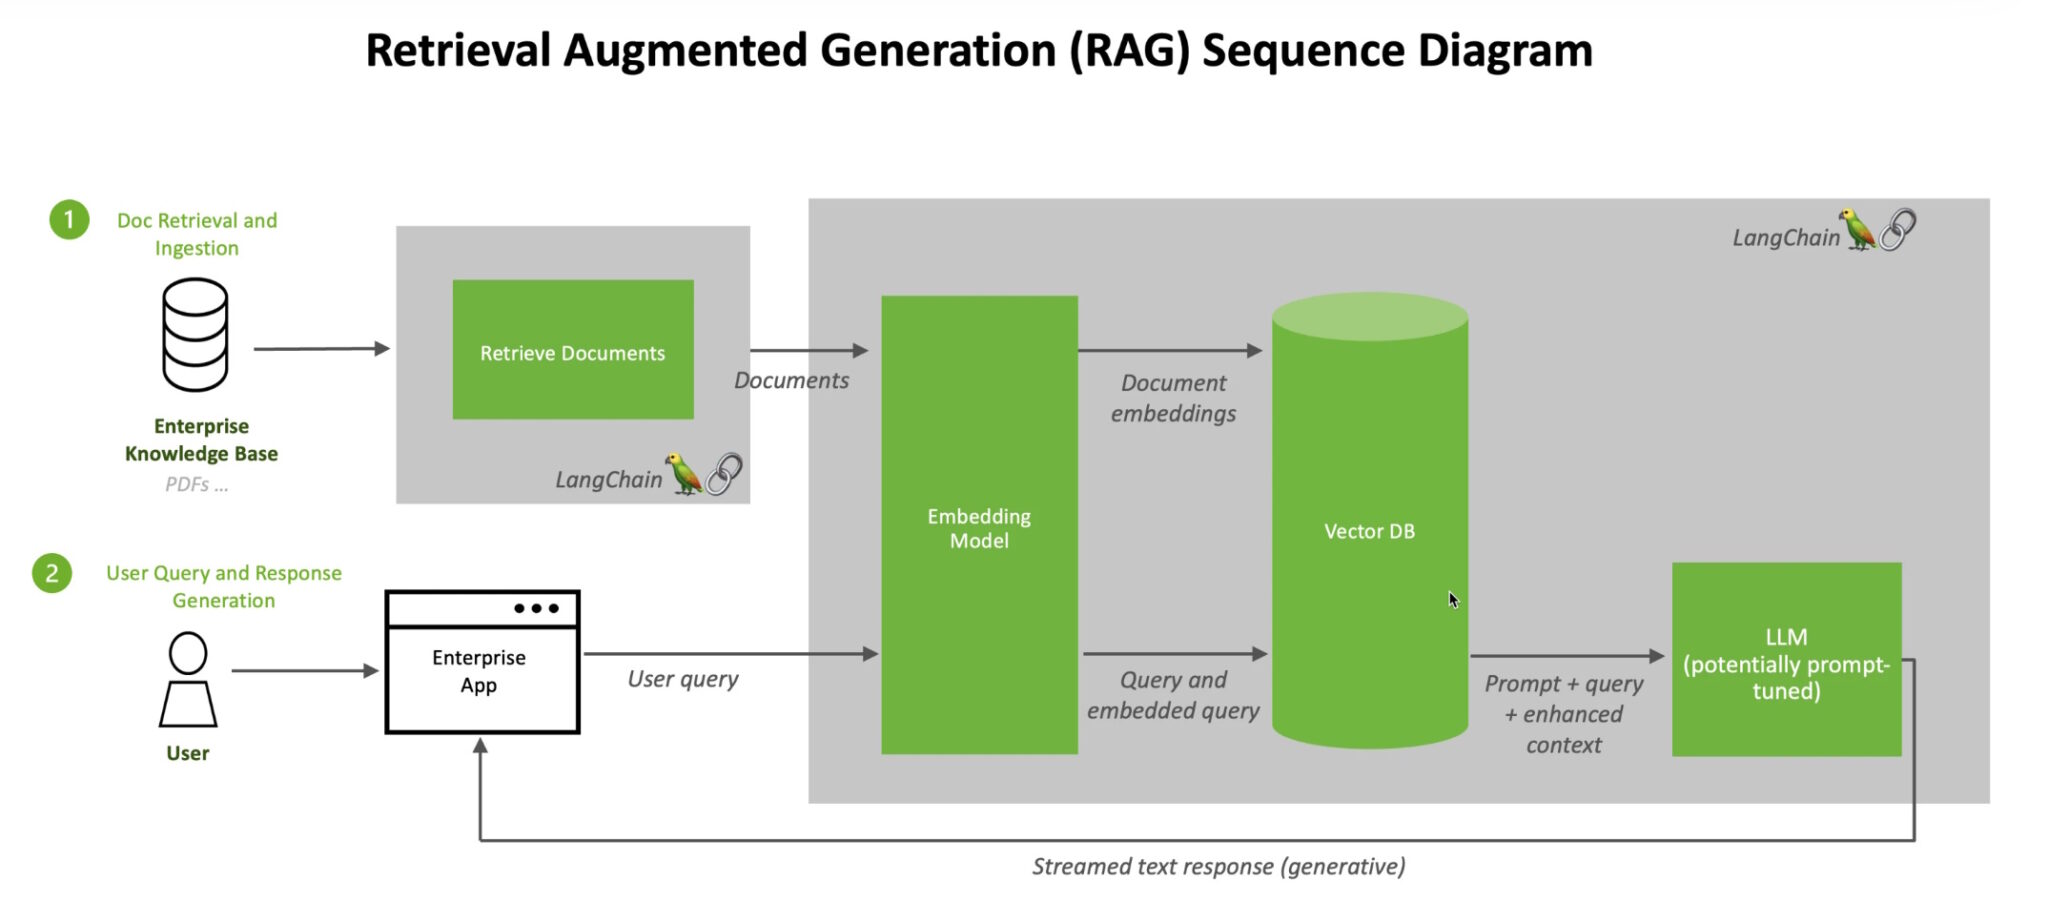
Now we will use that chain workflow to create a simple chat application using Panel. In the diagram above, this would be our “Enterprise App”, but obviously much simpler and not ready for production at this stage.
To begin, we will setup the asynchronous callback function for the pn.chat.ChatInterface layout component. This will allow us to interact with the chat interface and ask questions.
The ChatInterface is a high-level layout, it provides front-end interface for inputting different kinds of messages: text, images, PDFs, etc.
This layout provides front-end methods to:
Input (append) messages to the chat log.
Re-run (resend) the most recent user input ChatMessage.
Remove messages until the previous user input ChatMessage.
Clear the chat log, erasing all ChatMessage objects.
async def callback(contents, user, instance):
    # 1. Create a panel callback handler
    # The Langchain PanelCallbackHandler is useful for rendering and streaming the chain of thought
    # from Langchain objects like Tools, Agents, and Chains.
    # It inherits from Langchain’s BaseCallbackHandler.
    # Here we set the user to be the model name "OLMo" with an avatar of a tree emoji "🌳"
    # for the tree of knowledge.
    callback_handler = pn.chat.langchain.PanelCallbackHandler(
        instance, user="OLMo", avatar="🌳"
    )

    # 2. Set to not return the full generated result at the end of the generation;
    # this prevents the model from repeating the result in the interface
    callback_handler.on_llm_end = lambda response, *args, **kwargs: None

    # 3. Create and setup the Langchain chain object with the callback handler and input prompt template
    chain = get_chain(
        callback_handlers=[callback_handler],
        input_prompt_template=input_prompt_template,
    )

    # 4. Run the chain with the input contents
    _ = await chain.ainvoke(contents)
Once we have a callback function, now we’re ready to pass that to the ChatInterface layout component.
The code below takes in the asynchronous callback function from above and serves the chat interface to the user. This callback function will run every time the user sends a message in the chat interface. The callback function callback will receive the input text as part of the contents. The contents will be passed to the Langchain chain where:
the retriever will fetch document based on the input text
generate prompt with instruction, document results, and question input text
generate answer based on the prompt
return the generated answer and retrieved document text to the user
pn.chat.ChatInterface(callback=callback).servable()
If you’re running this notebook on JupyterLab, there should be a Panel logo in the menu bar of your notebook. You can clear output and restart the kernel, then enable the Preview for this app by clicking on Panel’s logo in the menu bar of your notebook. Once clicked, you should see a new tab being opened next to your notebook tab, and after some moment your app will be rendered in this tab.